Back to the DOSBox-X Wiki Welcome page.
PC DOS and MS-DOS Installation Guide
This guide explains how to boot regular (or real) IBM PC DOS or Microsoft MS-DOS in DOSBox-X, including creating hard disk images.
README.1ST
Before going through this guide, consider if you really need this as the integrated DOS emulation in DOSBox-X is more convenient for typical use-cases. Booting real DOS is rarely necessary to run DOS applications and games, or even running Windows version up to Windows 3.11 in DOSBox-X. And even if you have an application that requires a specific DOS version, you can change the reported version of the integrated DOS in DOSBox-X, which is often sufficient.
There are three ways to change the DOS version that DOSBox-X reports:
-
In the DOSBox-X config file, there is a "ver" setting under the [dos] section, or from the DOSBox-X Configuration Tool. For example, setting
ver = 7.1will cause DOSBox-X to set the initial DOS version as 7.1, instead of the default 5.0. -
You can also set the reported DOS version with the
VERcommand in the DOSBox-X command line. For example,VER 6.22will cause DOSBox-X to claim to be version 6.22, andVER 7.1will set the reported DOS version to 7.1 (7.10). -
Furthermore, you can select a DOS version to report from the “Reported DOS version” menu (under "DOS"), which includes 3.3, 5.0, 6.22, and 7.1, or you can enter another version by selecting "Edit". The new DOS version will take effect immediately after it is selected or entered.
|
Note
|
LFN (Long File Name) support will be enabled when the reported version is set to 7.0 or higher with the default setting, and FAT32 disk image support will be enabled when the reported version is set to 7.1 or higher. |
Disadvantages of booting DOS in DOSBox-X
Some disadvantages of booting regular DOS in DOSBox-X includes:
-
Inability to use the
MOUNTcommand to access directories on the host filesystem (see below for a possible workaround). All storage will have to be in the form of images, and they need to be mounted usingIMGMOUNTbefore using theBOOTcommand to boot regular DOS. Or alternatively an empty diskette or CD drive needs to be emulated usingIMGMOUNT. -
If you need to access a CD or DVD drive you need to load an IDE/PATA CD/DVD driver and MSCDEX (or equivalent)
-
If you need a mouse, you need to load a mouse driver (e.g. MOUSE.COM or CTMOUSE.EXE)
-
Less free memory in the lower 640KB range, and having to tune available memory by selectively loading drivers high
-
If you need XMS memory you need to load a driver (typically HIMEM.SYS)
-
If you need EMS and/or UMB memory you need to load a driver (typically EMM386.EXE)
External links
Some external links with useful information:
Where to get DOS?
These pages assume that you have PC DOS or MS-DOS diskette images. Getting these image files is outside the scope of this guide.
DOS version highlights
DOS versions 1.0-5.0x
Unless noted otherwise, the PC DOS and MS-DOS versions are equivalent for this guide. There are various limitations that DOS imposes that are dependent on the version. A few milestones:
-
PC DOS 1.0, supports only 5.25" 8-sector 160KB (SSDD) diskettes
-
PC DOS 1.1, adds support for 5.25" 8-sector 320KB (DSDD) diskettes
-
MS-DOS 1.25
-
First version available to other OEMs
-
Equivalent to PC DOS 1.1 (but missing DISKCOPY, DISKCOMP, COMP and MODE utilities)
-
-
DOS 2.0
-
First to support directories (CD, RD/RMDIR, MD/MKDIR)
-
First to support HDDs up to 16 or 32MB (depending on OEM)
-
First to support 5.25" 9-sector 180KB (SSDD) and 360KB disks (DSDD)
-
-
DOS 3.0
-
First version to support FAT16 partitions up to 32MB
-
First version to support 5.25" 1.2MB disks (HD)
-
First version to support the AT internal clock
-
-
DOS 3.2, adds support for 3.5" 720kB disks (2DD)
-
DOS 3.3
-
First version to support extended and logical partitions
-
First version to support HDDs up to 504MB
-
First version to support 3.5" 1.44MB disks (HD)
-
-
DOS 4.0
-
First version to allow HDDs up to 4,095MB and larger partitions
-
First version to included HIMEM.SYS XMS 2.x driver with support for up to 16MB RAM
-
-
DOS 5.0
-
First version to support 3.5" 2.88MB disks (ED)
-
First version to support HDDs up to 7.84GB with 2GB partitions
-
DOS 5 is the last version for which Microsoft and IBM shared code. From this point, Microsoft MS-DOS and IBM PC DOS are developed independently and start to diverge.
Microsoft MS-DOS 6+
-
MS-DOS 6.0 included an updated HIMEM.SYS XMS 3.x driver with support for up to 64MB RAM
-
MS-DOS 7.0 (included with Windows 95 and 95A)
-
First version to support VFAT
-
First version to allow up to 4GB RAM
-
First version to support HDDs up to 32GB (CHS type only)
-
-
MS-DOS 7.1 (included with Windows 95 OSR2, 98 and 98SE)
-
First version to support FAT32
-
First version to support LBA for HDDs up to 2TB, although FDISK requires a patch to support HDD sizes greater than 64GB.
-
-
Considered the best MS-DOS version to be used in modern systems. While unofficial, there is also a stand-alone MS-DOS 7.1 installation package available.
-
MS-DOS 8.0 (included with Windows ME)
-
Removed some features such as real-mode support, although there are patches to re-enable some of these features.
-
IBM PC DOS 6+
-
PC DOS 6.1
-
PC DOS 6.3
-
PC DOS 7.0 / 2000
-
Introduces XDF diskettes
-
-
PC DOS 7.1 (kernel files only, and only for OEMs)
-
Adds support for LBA and FAT32
-
DOS editions
MS-DOS was licensed by many clone manufacturers and in the early days these OEM editions were customized to the manufacturer, and therefore many of these early OEM specific editions don’t work, or only work partially in DOSBox-X. Because of this, up to DOS version 3.2, it is typically easier to use the IBM PC DOS versions in DOSBox-X.
Booting DOS from diskettes
Booting DOS from a diskette image is pretty straight forward.
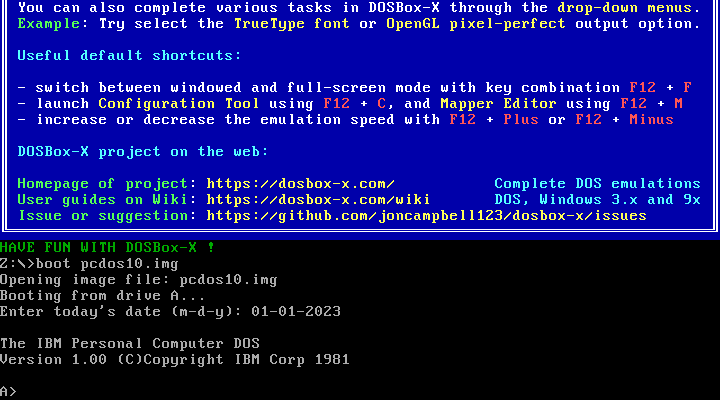
Start DOSBox-X and you should find yourself at the DOSBox-X Z:\> prompt.
This is not a real DOS, but a 'simulated' DOS that is compatible with most DOS games and applications.
Now type something equivalent to
BOOT dos.img
Assuming that dos.img is an uncompressed DOS disk image in IBM-MFM format (typically with a file extension of .IMG or .IMA), in your current working directory, it should start it. This even works for the original IBM PC DOS Version 1.00, which cannot be installed as it only supports floppy disks.
Guides to installing DOS in DOSBox-X
Hints and Tips
Host Folder Mounts
Starting with DOSBox-X 2022.08.0, there is optional support to dynamically convert a host folder mount to an emulated FAT harddisk for use when you need to boot a guest OS, such as PC DOS, MS-DOS or FreeDOS.
This can be accomplished in one of two ways. Either when you issue the boot command, you add the option -convertfat. e.g. boot c: -convertfat.
Or by setting the following option in your DOSBox-X config file:
[sdl]
convertdrivefat = true
When you now boot from a real image file, it will attempt to convert ALL folder mounts at the time of booting to emulated FAT Harddisks.
|
Note
|
You cannot boot from such an emulated FAT harddisk. You will still need some other bootable image file to actually boot a guest OS. |
|
Note
|
This conversion is dynamic, effectively creating an emulated FAT harddisk out of a folder mount.
This converted FAT harddisk is not automatically stored permanently.
You can however, store it as a permanent image file that you can later mount with IMGMOUNT, using the "Drive" > "drive letter" > "Save to disk image" option from the menus.
Please see the "Creating harddisk images from folder mounts" section in the Guide: Managing image files in DOSBox-X for more information.
|
|
Note
|
There is currently no support for creating emulated CD-ROM or Floppy drives out of folder mounts with this method. Any CD-ROM or Floppy folder mounts will also be converted to harddisk folder mounts, and may not actually work for the intended purpose. |
One thing to note, is that there is no way to specify the FAT type to use for the conversion.
The FAT type will be automatically selected based on the aggregate size of files in the folder, plus 250MiB (this can be adjusted with the convert fat free space option in the DOSBox-X config file).
If the total space of files + 250MiB does not exceed 2GiB, it will convert it into a FAT16 disk. Otherwise, it will become a FAT32, which in turn will require a guest OS with FAT32 support.
Alternatively, you can also make the emulated FAT drive read-only by using the -convertfatro option with the boot command. Or by setting convert fat free space=0 option in the DOSBox-X config file.
DOS disk caching software
The DOS setup program may put SMARTDRV.EXE in AUTOEXEC.BAT to run on startup. This made sense back in the day, but it provides no speed advantages when run on an emulator on a modern host operating system. In fact, it may actually be counterproductive. As such it is recommended to disable SmartDrive or similar disk caching programs.
Shutdown DOS
Normally when running DOSBox-X, you can simply type either the EXIT or SHUTDOWN /S command and DOSBox-X will close.
The /S option of SHUTDOWN command instructs DOSBox to shut down, and it relies on the APM support provided by DOSBox-X.
It has become a built-in DOS command as of DOSBox-X version 0.83.20.
On the other hand, if you are running a real DOS disk image, you will need to copy the SHUTDOWN.COM program (located in the Z:\BIN directory) to your disk image.
This can be useful for scripted operations, for instance if you’re running a program from AUTOEXEC.BAT, and want it to shut down DOSBox-X when it finishes.
|
Note
|
If SMARTDRV is being used, you MUST do a SMARTDRV /C before invoking the SHUTDOWN command as otherwise you risk filesystem corruption of the disk image.
|
Example AUTOEXEC.BAT usage of SHUTDOWN.COM in combination with Windows 3.x:
PATH C:\DOS;C:\WINDOWS
SET TEMP=C:\WINDOWS\TEMP
C:\WINDOWS\SMARTDRV.EXE
C:\WINDOWS\WIN.COM
C:\WINDOWS\SMARTDRV.EXE /C
SHUTDOWN.COM /S
With this example, it will start Windows automatically on startup, and when you exit Windows, it will flush the disk cache and shutdown DOSBox-X.
Long wait on HIMEM.SYS
If HIMEM is being loaded on startup, you may get a message "HIMEM is testing extended memory…", which can take a considerable amount of time and is pointless in an emulated environment.
For MS-DOS, you can bypass it by editing CONFIG.SYS and changing DEVICE=C:\DOS\HIMEM.SYS to DEVICE=C:\DOS\HIMEM.SYS /TESTMEM:OFF.
Reboot DOS
You can reboot (restart) DOS by selecting the "Reboot guest system" menu item (under "Main").
If for some reason you want to do a reboot from the command-line, you can do so with the command SHUTDOWN /R. For running real DOS disk images, you need to copy the SHUTDOWN.COM program located in the Z:\BIN directory to your disk image.
For rebooting DOS with such a command you may also want to check the "Enable quick reboot" menu item (under "DOS") for a faster restart of the guest DOS system.
Boot menu
If you used IMGMAKE from DOSBox-X prior to 2022.08.0 to create a partitioned image, when booting from the image you will get the following boot menu with a 4-second timeout.
F1 . . . Dos
F5 . . . disk2

Default: F1
This is due to a special Master Boot Record (MBR) that IMGMAKE used to create.
Images created with IMGMAKE from DOSBox-X 2022.08.0 or later will no longer show this menu.
Pressing Enter or F1 will continue the boot process, without having to wait for the timeout.
Alternatively you can remove the boot menu by booting to DOS and running FDISK /MBR to create a new MBR without the boot menu.