Back to the DOSBox-X Wiki Welcome page.
Setting up networking in DOSBox-X
Overview
DOSBox-X has support for emulating the Novell NE2000 network adapter through the use of either PCAP or SLIRP back-end. This guide describes how to set it up and also tries to simplify the process for users.
Apart from NE2000 networking, DOSBox-X also has integrated IPX support and network redirector functions. In Windows builds of DOSBox-X, you can directly access or browse network resources using UNC network paths in the form \\MACHINE\FOLDER using DOS commands (such as DIR, MD and COPY) when the network redirector feature is not disabled.
NE2000 resource usage
By default, the emulated NE2000 will use IRQ 3 and IO range 300-31F. This is typical of a real NE2000 adapter, and some NE2000 drivers will look there by default.
|
Note
|
DOSBox-X does not support PnP for the NE2000, meaning that Windows 95, 98 and ME may not autodetect it, and even if they do, they may assume the wrong resources. |
The problem lies in the fact that, IRQ 3 is also used for COM2, and therefore they conflict. Most software will work regardless of the conflict, as long as you’re not actually using COM2. But some software, notably Windows 95, 98 and ME may complain about a resource conflict.
As such it is recommended to either move the emulated NE2000 adapter to a different IRQ, or to disable COM2.
In the below examples the emulated NE2000 is set to IRQ10 using the nicirq= setting, to resolve the conflict.
But you need to ensure that any NE2000 device drivers that are loaded, are also set to look for it at the same resources.
|
Note
|
Setting the NE2000 to IRQ 10 is not possible if you’re emulating a 8086 (machine=8086), as they only have IRQ 0-7 available. In that case it is probably better to disable COM2.
|
If you want to instead disable COM2, and leave the emulated NE2000 at its default resources, add the following to you DOSBox-X config file.
[serial]
serial2=disabled
To enable networking you first need to enable NE2000 adapter emulation in your DOSBox-X config file and select an appropriate back-end for the NE2000 emulation.
[ne2000] config options
ne2000
-
Default value: false
-
Valid values: true, false
This setting enables or disables the NE2000 emulation.
nicbase
-
Default value: 300
-
Valid values: 200, 220, 240, 260, 280, 2C0, 300, 320, 340, 360
This is the IO base address of the emulated NE2000 adapter. You may sometimes see the base address written as 0x300 which means hex 300.
It will require 32bits, starting at the defined base address. So for the default base value of 300 the full IO range used is actually 300-31F.
nicirq
-
Default value: 3
-
Valid values: 3, 4, 5, 9, 10, 11, 12, 14, 15
This is the IRQ (Interrupt Request Level) of the emulated NE2000 adapter.
You cannot just select a random value as many IRQs are already pre-assigned to various devices. e.g.
-
IRQ3 to COM2 serial port (enabled by default in DOSBox-X)
-
IRQ4 to COM1 serial port (enabled by default in DOSBox-X)
-
IRQ5 may be assigned to the sound card (not the case by default in DOSBox-X)
-
IRQ9 is an alias from IRQ2 but should be safe to use
-
IRQ10 free
-
IRQ11 free
-
IRQ12 used by the PS/2 mouse emulation
-
IRQ14 used by the primary IDE/ATA emulation
-
IRQ15 used by the secondary IDE/ATA emulation (usually CD-ROM drive)
|
Warning
|
The default IRQ value (3) conflicts with the emulated COM2 port that is enabled by default. |
|
Warning
|
If you’re emulating a 8086 CPU machine type, the valid IRQ needs to be in the range of 0-7, which in this case effectively means 3, 4 or 5. This is because the 8086 only had a single PIC (Programmable Interrupt Controller), while later machines had two. |
macaddr
-
Default value: AC:DE:48:88:99:AA
This is the MAC address of the emulated NE2000 adapter. Only one instance of a MAC address may exist on a network.
|
Warning
|
If you want to run multiple DOSBox-X instances on the same network, you MUST ensure they all have a different MAC address. |
The first 3 bytes are known as the OUI (Organisational Unique Identifier), and typically represent the network card manufacturer. The AC:DE:48 OUI used by default, is a special private range, and it is recommended that you use this range.
The last 3 bytes can be freely chosen. Each byte can range from 00 to FF.
Some examples of valid alternative MAC addresses with the same OUI:
-
AC:DE:48:11:22:33
-
AC:DE:48:AA:BB:CC
-
AC:DE:48:1D:2E:3F
Selecting a back-end for NE2000
There are two different back-ends to the NE2000 adapter emulation, namely pcap and slirp.
The default is backend=auto, which implies backend=slirp if SLIRP support is available, otherwise backend=pcap is implied if PCAP support is available.
backend=pcap
The PCAP back-end uses something called "Promiscuous mode". This has the advantage that applications in DOSBox-X can use various legacy network protocols, such as IPX/SPX and NetBIOS Frames (aka NetBEUI) in addition to TCP/IP. This mode not only allows communication between different DOSBox-X instances on the same network, but also with legacy PCs on the same network.
However, for this to work DOSBox-X needs to have very low level access to your real network adapter. In some cases this is not possible, such as:
-
Network Adapter or Driver not supporting Promiscuous mode (most wireless adapters fall into this category)
-
Your Ethernet switch not allowing multiple MAC addresses on a single port, or doing any kind of MAC address whitelisting.
-
Sandboxed versions of DOSBox-X (e.g. Flatpak) not allowing the required low-level access
To enable NE2000 emulation with the pcap back-end, add the following to your DOSBox-X config file:
[ne2000]
ne2000=true
nicirq=10
backend=pcap

[ethernet, pcap]
realnic=list
The ''list'' value for ''realnic='' will need to be replaced by a value representing your actual network adapter. See below for more information.
[ethernet, pcap]
Create this section in your DOSBox-X config file if you want to use PCAP.
The only value that you normally need to set here is realnic=.
realnic
-
Default value: list
-
Valid values: list, number or (partial) name of interface
In the below examples you will see the usage or realnic=. Once you have located the host network adapter to use, using realnic=list, you need to set it to that adapter.
This can be done in one of two ways.
You can either specify the number of the adapter, or a part of the name of the adapter.
e.g. If you want to use the entry:
LOG:  9. rpcap://\Device\NPF_{AAAAAAAA-BBBB-CCCC-DDDD-XXXXXXXXXXXX}
    (Network adapter 'Realtek USB NIC' on local host)
You can either specify it as realnic=9 or realnic=Realtek, or if that is not unique you can also fully specify the name like so: realnic="Realtek USB NIC"
It is recommended to use a name, as the order of the numbers can change due to various events on the host (e.g. adding or removing devices, or even launching other virtual machines)
timeout
-
Default value: default
-
Valid values:
Specifies the read timeout for the device in milliseconds for the pcap backend, or the default value will be used.
The default for Windows hosts is -1 which to WinPCap appears to mean "non-blocking mode". For other platforms the default is 3000ms
backend=slirp
Unlike the PCAP back-end, the SLIRP back-end does not require Promiscuous mode. As such it will work with wireless adapters, and it will work in most sandboxed environments.
But obviously, it has its own limitations.
-
It is not supported in all platforms (such as Windows Visual Studio builds)
-
It only supports the TCP/IP protocol (other protocols must be TCP/IP encapsulated by the application running in DOSBox-X)
-
The DOSBox-X instance will effectively be behind the equivalent of a NAT gateway, meaning that you can communicate outbound (e.g. download), but no systems on the LAN can instantiate a new connection to the DOSBox-X instance. Which means that for instance, two DOSBox-X instances on the same LAN using
backend=slirpcannot communicate with each other. This can be overcome using thetcp_port_forwards=andudp_port_forwards=options.
To enable NE2000 emulation with the slirp back-end, add the following to your DOSBox-X config file:
[ne2000]
ne2000=true
nicirq=10
backend=slirp
You can optionally specify additional SLIRP options
[ethernet, slirp]
Create this optional section in your DOSBox-X config file. Generally these settings do not need to be modified from their default values. Just if you happen to be using the 10.0.2.0/24 network locally, will you need to modify the various IP settings.
restricted
-
Default value: false
-
Valid values: true, false
Disables access to the host from the guest. This effectively creates an isolated virtual network
disable_host_loopback
-
Default value: false
-
Valid values: true, false
Disables guest access to the hosts loopback interfaces. This effectively prevents the guest from accessing the hosts 127.0.0.0/8 loopback network. E.g. 127.0.0.1
mtu
-
Default value: 0
-
Valid values: 576-?
The maximum transmission unit for Ethernet packets transmitted from the guest. Specifying 0 will use libslirp’s default MTU size of 1500 bytes. A value larger than 9000 is not recommended. MTU and MRU sizes should normally be identical.
|
Note
|
If you want to use a larger MTU than default, your hosts network adapter and your network switch needs to support it, otherwise the packets will get truncated. |
mru
-
Default value: 0
-
Valid values: 576-?
The maximum receive unit for Ethernet packets transmitted to the guest. Specifying 0 will use libslirp’s default MRU size of 1500 bytes. MRU and MTU sizes should normally be identical.
|
Note
|
If you want to use a larger MRU than default, your hosts network adapter and your network switch needs to support it, otherwise the packets will get truncated. |
ipv4_network
-
Default value: 10.0.2.0
-
Valid values: Any valid IPv4 network address
The IPv4 network the guest and host services are on.
ipv4_netmask
-
Default value: 255.255.255.0
-
Valid values: Any valid IPv4 netmask for the provided network address
The netmask for the IPv4 network.
ipv4_host
-
Default value: 10.0.2.2
The address of the host system on the IPv4 network, which will act as the gateway.
ipv4_nameserver
-
Default value: 10.0.2.3
The address of the nameserver service provided by the host on the IPv4 network.
ipv4_dhcp_start
-
Default value: 10.0.2.15
The start address used for DHCP by the host services on the IPv4 network.
tcp_port_forwards
-
Default value: <blank>
Forwards one or more TCP ports from the host into the DOS guest.
The format is:
-
port1 port2 port3 … (e.g.,
21 80 443)-
This which will forward FTP, HTTP, and HTTPS into the DOS guest.
-
-
If the ports are privileged on the host, a host:guest mapping can be used … (e.g.,
8021:21 8080:80).-
This will forward port 8021 and 8080 on the host to FTP and HTTP in the guest.
-
-
A range of adjacent ports can be abbreviated with a dash: start-end … (e.g.,
27910-27960)-
This will forward port 27910 to 27960 into the DOS guest.
-
-
Mappings and ranges can be combined, too: hstart-hend:gstart-gend …, (e.g,
8040-8080:20-60)-
This forwards ports 8040 to 8080 on the host into ports 20 to 60 in the guest
-
Notes:
-
If mapped ranges differ, the shorter range is extended to fit.
-
If conflicting host ports are given, only the first one is set up.
-
If conflicting guest ports are given, the latter rule takes precedence.
udp_port_forwards
-
Default value: <blank>
The format is the same as for TCP port forwards.
Setup guide for Linux hosts
Install libpcap and/or libslirp
This depends on your Linux distribution, but you need to have the libpcap library installed for the pcap back-end. Or the libslirp library for the slirp back-end.
Debian based (e.g. Ubuntu)
If you’re running a recent Debian or Debian based distribution such as Ubuntu, you can install the libraries from the command-line as follows:
$ sudo apt-get install libpcap libslirpRed Hat, SUSE or Fedora
If you used the provided RPM, libpcap and libslirp are dependencies and will be automatically installed when using a package manager to install DOSBox-X.
Otherwise, if you’re running a recent Red Hat, CentOS, SUSE or Fedora Linux distribution, you can install the libraries from the command-line as follows:
$ sudo dnf install libpcap libslirpCheck if your DOSBox-X binary supports networking
The provided RPMs have networking enabled, but if you compiled DOSBox-X yourself and the libpcap or libslirp headers where not installed, the resulting DOSBox-X binary will lack libpcap and/or libslirp support. To check if your binary has networking support, run the following command:
$ ldd /usr/bin/dosbox-x |grep "pcap\|slirp"
	libpcap.so.1 => /lib64/libpcap.so.1 (0x00007f7877a7a000)
	libslirp.so.0 => /lib64/libslirp.so.0 (0x00007f7877a5c000)
In the above example, the DOSBox-X binary has both libpcap and libslirp support, meaning it has networking. If the command returns nothing you do not have networking. If you’re DOSBox-x binary has no networking, your options are to use the pre-compiled RPM package, or compile it yourself with libpcap and/or libslirp support enabled.
Setup permissions for PCAP
The provided RPM packages automatically set up the necessary permission for libpcap to function.
Otherwise, you need to ensure that the DOSBox-X binary has permission to listen to and generate low level network traffic (promiscuous mode). You can do this as follows:
$ which dosbox-x
/usr/bin/dosbox-x
$ getcap /usr/bin/dosbox-x
$
The first command returns the location of the dosbox-x binary (assuming it is in your path), the second command checks its capabilities. In this case getcap does not return anything, meaning it has no special capabilities, which you need to rectify if you want to be able to have PCAP networking in DOSBox-X. Run the following command:
$ sudo setcap cap_net_raw+ep /usr/bin/dosbox-xThis command will allow the dosbox-x binary to access the network interface in raw mode (pcap), meaning it can see all the traffic on all the network interfaces.
To validate that now the DOSBox-X binary indeed has the cap_net_raw capability, run:
$ getcap /usr/bin/dosbox-x
/usr/bin/dosbox-x = cap_net_raw+ep
Warning: If you manually install the dosbox-x binary, you will have to take this step each time you do an upgrade.
Locate host network interface for PCAP
You now need to find which host network interface you want to use for bridging with PCAP.
For this you need to have a DOSBox-X config file with NE2000 support enabled, and you need to know which host network adapter will be used for bridging. It is highly recommended to only bridge to wired Ethernet adapters, as wireless adapters generally do not work with PCAP.
Create a simple ne2000.conf config file as follows:
[ne2000]
ne2000=true
nicirq=10
backend=pcap

[ethernet, pcap]
realnic=list
Now, from a terminal, start DOSBox-X, using the ne2000.conf config file you just created.
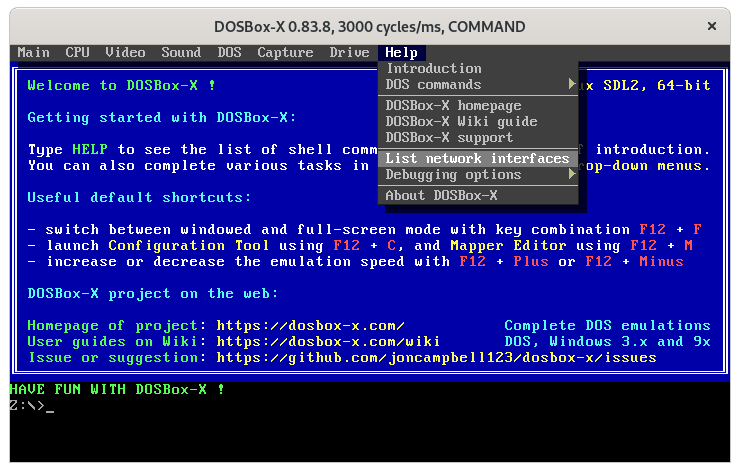
dosbox-x -conf ne2000.confNow from the DOSBox-X menu bar, select Help followed by List network interfaces
You will now get a list of available network interfaces, similar to the screenshot shown below.
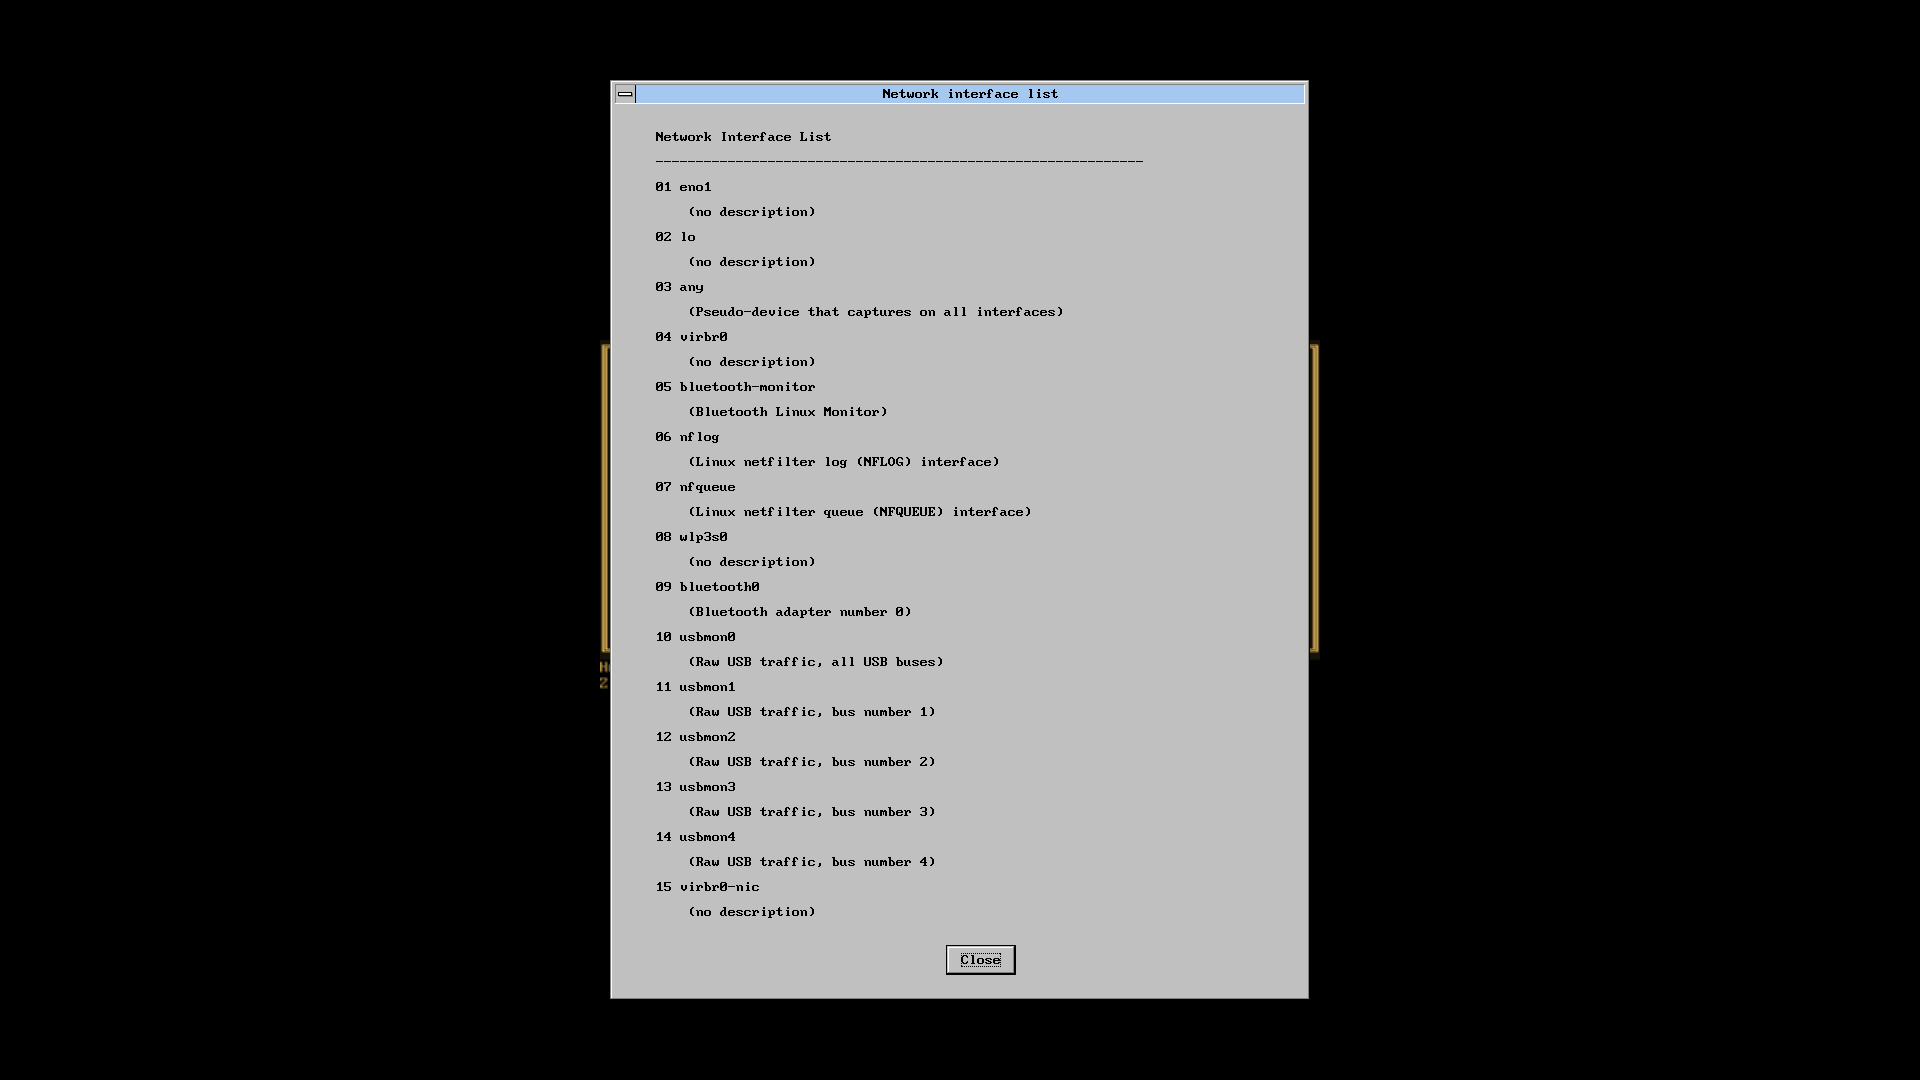
That is an example of the network interfaces that were detected for my Linux PC. Now look at your own list, and locate an appropriate adapter to use. In the above example, 1, or eno1 is the integrated Ethernet of my PC, which we will use in the below example.
Edit the ne2000.conf config file and change realnic= to the number or name of your chosen network interface. e.g.:
[ne2000]
ne2000=true
nicirq=10
backend=pcap

[ethernet, pcap]
realnic=eno1
You can merge your config snippet with your Windows for Workgroups, Windows 95 or 98 config file, or use it to run something like mTCP in DOSBox-X.
Setup guide for Windows hosts
Install PCAP
First you need to install PCAP support. As WinPcap is no longer maintained, Npcap seems the best candidate these days.
|
Note
|
At this point SLIRP is only supported in some MinGW builds, and not in Visual Studio builds. |
Locate host network interface
You now need to find which host network interface you want to use for bridging.
For this you need to have a DOSBox-X config file with NE2000 support enabled, and you need to know which host network adapter will be used for bridging. It is highly recommended to only bridge to wired Ethernet adapters, as wireless adapters generally do not work.
Create a simple ne2000.conf config file as follows:
[ne2000]
ne2000=true
nicirq=10

[ethernet, pcap]
realnic=list
Now, from a command prompt, start DOSBox-X, using the ne2000.conf config file you just created.
dosbox-x -conf ne2000.confNow from the DOSBox-X menu bar, select Help followed by List network interfaces
You will now get a list of available network interfaces, similar to the list shown below.
LOG:  1. rpcap://\Device\NPF_{AAAAAAAA-BBBB-CCCC-DDDD-XXXXXXXXXXXX}
    (Network adapter 'NdisWan Adapter' on local host)
LOG:  2. rpcap://\Device\NPF_{AAAAAAAA-BBBB-CCCC-DDDD-XXXXXXXXXXXX}
    (Network adapter 'Generic Mobile Broadband Adapter' on local host)
LOG:  3. rpcap://\Device\NPF_{AAAAAAAA-BBBB-CCCC-DDDD-XXXXXXXXXXXX}
    (Network adapter 'Microsoft' on local host)
LOG:  4. rpcap://\Device\NPF_{AAAAAAAA-BBBB-CCCC-DDDD-XXXXXXXXXXXX}
    (Network adapter 'Microsoft' on local host)
LOG:  5. rpcap://\Device\NPF_{AAAAAAAA-BBBB-CCCC-DDDD-XXXXXXXXXXXX}
    (Network adapter 'NdisWan Adapter' on local host)
LOG:  6. rpcap://\Device\NPF_{AAAAAAAA-BBBB-CCCC-DDDD-XXXXXXXXXXXX}
    (Network adapter 'Microsoft' on local host)
LOG:  7. rpcap://\Device\NPF_{AAAAAAAA-BBBB-CCCC-DDDD-XXXXXXXXXXXX}
    (Network adapter 'NdisWan Adapter' on local host)
LOG:  8. rpcap://\Device\NPF_{AAAAAAAA-BBBB-CCCC-DDDD-XXXXXXXXXXXX}
    (Network adapter 'Microsoft' on local host)
LOG:  9. rpcap://\Device\NPF_{AAAAAAAA-BBBB-CCCC-DDDD-XXXXXXXXXXXX}
    (Network adapter 'Realtek USB NIC' on local host)
LOG: 10. rpcap://\Device\NPF_Loopback
    (Network adapter 'Adapter for loopback traffic capture' on local host)
LOG: 11. rpcap://\Device\NPF_{AAAAAAAA-BBBB-CCCC-DDDD-XXXXXXXXXXXX}
    (Network adapter 'Intel(R) Ethernet Connection I219-V' on local host)
That is an example of the network interfaces that were detected for my Windows 10 PC (with the UUIDs masked). Now look at your own list, and locate an appropriate adapter to use. In the above example, 9 is the USB Ethernet adapter I want to use. It may take you a few tries to find the correct adapter.
Edit the ne2000.conf config file and change realnic= to the value or name of your chosen network interface. e.g.:
[ne2000]
ne2000=true
nicirq=10
backend=pcap

[ethernet, pcap]
realnic="Realtek USB NIC"
You can merge your config snippet with your Windows for Workgroups, Windows 95 or 98 config file, or use it to run something like mTCP in DOSBox-X.
mTCP example
This example uses mTCP to test if networking is working in DOSBox-X.
This requires that you first download the latest version of mTCP, and a NE2000 DOS packet driver (the latter is automatically available in DOSBox-X when the NE2000 networking feature is enabled).
External links
unzip both mTCP and the NE2000 DOS Packet driver into a directory. In the below example the directory is named mtcp, then start DOSBox-X with the ne2000.conf config file that you created:
dosbox-x -conf ne2000.confNow in DOSBox-X run the following commands:
MOUNT C mtcp
C:
SET MTCPCFG=C:\SAMPLES\SAMPLE.CFG
NE2000 0x60 10 0x300
DHCP
If all worked fine, you should have gotten an IP address, and you can now do something like
PING google.comCommon problem: Invalid MAC Address
When loading the NE2000 DOS Packet driver you get an all FF Ethernet MAC address:
C:\>NE2000 0x60 10 0x300
Packet driver for NE2000, version 11.4.3
Packet driver skeleton copyright 1988-93, Crynwr Software.
This program is freely copyable; source must be available; NO WARRANTY.
See the file COPYING.DOC for details; send FAX to +1-315-268-9201 for a copy.

System: [345]86 processor, ISA bus, Two 8259s
Packet driver software interrupt is 0x60 (96)
Interrupt number 0xA (10)
I/O port 0x300 (768)
My Ethernet address is FF:FF:FF:FF:FF:FF
This can actually have several causes.
-
Your DOSBox-X binary lacks networking support
-
(Linux) Your DOSBox-X binary does not have the right PCAP permissions to access networking
-
You do not have PCAP installed (libpcap on Linux, Npcap on Windows), or SLIRP
-
When loading the NE2000 driver you gave the wrong IRQ or IO port.
-
This should only affect non-standard setups where you specified a different
nicirq=ornicbase=in yourne2000.confconfig file.
-
Common problem: Cannot get DHCP lease
When starting DHCP you get only timeouts.
C:\>DHCP
mTCP DHCP Client by M Brutman (mbbrutman@gmail.com) (C)opyright 2008-2020
Version: Mar  7 2020

Timeout per request: 10 seconds, Retry attempts: 3
Sending DHCP requests, Press [ESC] to abort.

DHCP request sent, attempt 1: Timeout
DHCP request sent, attempt 2: Timeout
DHCP request sent, attempt 3: Timeout

Error: Your Ethernet card reported an error for every packet we sent.
Check your cabling and packet driver settings, including the hardware IRQ.
This can actually have several causes.
-
Check if you got a valid Ethernet MAC address when loading the NE2000 packet driver.
-
When using PCAP, try to set
REALNIC=in yourne2000.confconfig file to a different network interface. In particular wireless adapters are unlikely to work, so try wired Ethernet instead. The order in which the interfaces are listed can also change due to plugging or unplugging devices, or launching certain type of programs like Virtual Machines. -
Perhaps you don’t have a DHCP server on your network, or it is configured to only listen to known MAC addresses. Try to set manual IP settings, suitable for your network, at the bottom of
SAMPLES/SAMPLE.CFGand try if you can ping.
Common problem: Multiple DOSBox-X instances
By default, all DOSBox-X instances use the exact same MAC address (AC:DE:48:88:99:AA).
If there are multiple DOSBox-X instances running on the same host, or on different hosts on the same network segment, they will conflict with each other.
Unfortunately not all operating systems will warn you about this, but it will cause problems on the network and the DOSBox-X instances will not be able to communicate with each other.
The solution is to define a new MAC address for at least one of the DOSBox-X instances.
In your DOSBox-X config file, in the [ne2000] section, add a macaddr= line with a new MAC address.
The AC:DE:48 range is a reserved range for private use, so just modify the last three number blocks.
e.g.,
[ne2000]
ne2000=true
nicirq=10
macaddr=AC:DE:48:88:99:AB

[ethernet, pcap]
realnic=1
IPX example
There are two ways to enable IPX communication, which was used by some DOS and Windows games for multi-player support.
Using DOSBox-X integrated IPX support
DOSBox-X has integrated support for IPX over IP (IPX encapsulated in IP). You do not even have to enable NE2000 emulation for this.
The advantage of this is that you can communicate with any other system that is directly reachable over TCP/IP.
To test this, first ping the remote systems from the host OS to ensure connectivity.
A disadvantage of this approach is that you cannot communicate with retro PCs on the same network that are running the native IPX stack.
This process is described on the DOSBox wiki.
Using the NetWare 16-bit DOS Client
This example uses Novell’s IPX stack, and only works with the PCAP back-end. A disadvantage of this approach is that it is not routable over the Internet, meaning it can only communicate with other systems running the native IPX stack on your local network. An advantage is that it can communicate with a real retro DOS PC running IPX on your local network.
This requires that you first download the vlm121_2.exe and vlm121_6.exe files from the Novell NetWare 16-bit DOS Client.
The rest of the NetWare client files are typically not needed for the purpose of running DOS games that require IPX.
External links
Once you have downloaded the files, you need to extract them. The VLM121*.EXE files are individual self-extracting DOS ARJ archives. The easiest way is probably to extract them in DOSBox-X itself.
Notes
-
If you want to do a full installation of the NetWare 16-bit Client, you cannot run the NetWare
INSTALL.EXEin the emulated DOS environment that DOSBox-X provides. It will fail with "An invalid drive was given in path". You can however install it if you boot a real DOS in DOSBox-X. -
These instructions do not apply to the 32-bit NetWare client (client32) for DOS and 16-bit Windows.
-
You can extract the self-extracting EXE files on Linux with the command-line
arjutility, but you need to use the-heswitch to disable the Security Envelope check.
Unpacking the VLM archive in DOSBox-X
Move the files to a temporary directory for extraction, and from that directory launch DOSBox-X.
Then run the following commands:
MOUNT C .
C:
VLM121_2.EXE -y
VLM121_6.EXE -y
The files needed are still packed in yet another "Personal NetWare Packed File" archive. Extract them as follows:
MKDIR IPX
NWUNPACK LSL.CO_ \IPX
NWUNPACK IPXODI.CO_ \IPX
NWUNPACK NETBIOS.EX_ \IPX
NWUNPACK DOS\NE2000.CO_ \IPX
EXIT
The IPX directory that was created now contains the following files:
-
LSL.COM(Link Support Layer) -
IPXODI.COM(ODI IPX protocol provider) -
NETBIOS.EXE(NetBIOS Protocol over IPX) -
NE2000.COM(ODI driver for the NE2000 network adapter)
Create NET.CFG
Now create a text file called NET.CFG, and place it in the same directory as LSL.COM, with the following content:
Link Driver NE2000
        PORT 300
        IRQ 10
        FRAME Ethernet_802.2
Notes
-
If you used a different IRQ or IO (port) base address, adjust
NET.CFGaccordingly. -
If you’re running on Linux, be sure the
NET.CFGconfig file is saved in DOS format (with CRLF line terminators), otherwise the NE2000 driver will not be loaded at the specified resources. If necessary useunix2dosto convert it to DOS format.
Start IPX
Now modify your ne2000.conf config file that you created earlier, such that it contains the following lines in the [autoexec] section at the end:
MOUNT C .
C:
IPX\LSL.COM
IPX\NE2000.COM
IPX\IPXODI.COM
Adjust paths in the above example as necessary, and you should be able to run it from a command prompt as follows:
dosbox-x -conf ne2000.confNote: For games that require NETBIOS, you can also add IPX\NETBIOS.EXE at the end.
But note that this is NetBIOS over IPX, which cannot communicate with other systems running native NetBIOS Frames (NBF) or NetBIOS over TCP/IP.