Back to the PC DOS and MS-DOS Installation Guide
Installing DOS 4.0x in DOSBox-X
Overview
DOS version 4.00 is sometimes incorrectly referred to as the first DOS release where IBM had the development lead. This was actually not accurate as that was DOS 3.3. IBM PC DOS 4.0 when released got a bad rap in the press over bugs, compatibility with non-IBM PCs and memory usage. While some of these were valid points, the original DOS 4.0 release by IBM was never claimed to be compatible with non-IBM machines.
Key new features of DOS 4.00
-
First version to allow HDDs up to 4,095MB
-
First version to allow a DOS partition up to 2,047MB
-
First version to include a guided installation program
-
Added MEM and SWITCHES commands
-
Added XMA2EMS.SYS and XMAEM.SYS supporting LIM EMS 4.0
-
New DOS SHELL
-
National Language Support (NLS) enhancements
-
GRAPHICS utility upgraded with EGA/VGA support
These instructions apply to
-
Microsoft MS-DOS 4.00
-
First version to include HIMEM.SYS XMS 2.x driver with support for up to 16MB RAM
-
Added EMM386.SYS with support for LIM EMS 4.0
-
First version to include SMARTDRV.SYS
-
-
Microsoft MS-DOS 4.01
-
IBM DOS 4.00
-
IBM DOS 4.01
Notes
|
Warning
|
First, consider if you really want to use DOS 4.x as it was considered a buggy release. If you decide to continue with a full install, and you have the choice, do yourself a favour and use the 3.5" version as it will minimize the amount of disk swapping required. Also, the IBM PC-DOS release is easier to install then the MS-DOS release as it uses fewer disks, but lacks HIMEM.SYS, EMM386.SYS and SMARTDRV.SYS. |
|
Warning
|
Do not use the "Create blank disk image…" option from the "DOS" menu in DOSBox-X to create a harddisk image. It will create a partitioned and formatted harddisk image, which is incompatible with DOS versions prior to 5.0. |
|
Note
|
Unlike with MS-DOS, there is no obvious way to know if you have IBM DOS 4.00 or 4.01.
The VER command will claim Version 4.00 for either, as will the box, manuals and installer.
The ways to check are either to look at the disk labels, which will say 4.00 or 4.01, or check if some OS files like IBMBIO.COM and IBMDOS.COM are dated 08-03-1988 (MM-DD-YYYY), in which case you have the 4.01 release.
IBM released a corrective service (CSD UR22624) to upgrade a 4.00 installation to 4.01, you can view the README here: http://www.retroarchive.org/garbo/pc/doc-soft/dos400.bug
|
| OS | Media | Disks |
|---|---|---|
MS-DOS 4.0x |
5.25" 360KB |
Install, Select, Operating 1, Operating 2, Operating 3, Shell |
MS-DOS 4.0x |
3.5" 720KB |
Install, Operating, Shell |
IBM DOS 4.0x |
5.25" 360KB |
Install, Select, Operating 1, Operating 2, Operating 3 |
IBM DOS 4.0x |
3.5" 720KB |
Install, Operating |
-
MS-DOS OEM versions could have additional disks such as a Diagnostic disk.
-
In addition, the installation process will require BLANK diskette named "Select Copy"
-
Like DOS 3.3 before it, DOS 4.0x supports primary, extended and logical partitions. However, DOSBox-X has only limited support for extended and logical partitions. You can create them, and when you boot your DOS image, you can access them. But when you
IMGMOUNTthe image in DOSBox-X, the integrated DOS will only be able to access the primary partition. As such it is recommended to only create a single DOS partition per disk image, and if you need more space to create more disk images. -
DOS 4.0x supports HDDs up to 4,095MB. It is also supposed to support a primary partition up to 2,047MB and a logical partition of 2,048MB. But creating partitions that large will result in numerous problems, typically in
FORMATgiving a "Divide overflow" error. The solution, assuming you’re only going to have a single primary partition, is to create an HDD image no larger than 2014MB. -
DOS 4.0x supports the "type 6" FAT16 partition which DOSBox-X’s
IMGMAKEcreates, but is incompatible with the way the partition is formatted. The DOS 4.0x installer will not offer the option to install to the HDD. And if you manually SYS the drive, it will not boot from it. The solution is to exit to the command line and manually format the C: drive.
External links
Creating an MS-DOS 4.0x HDD image
In these examples we use a 32MB HDD image.
Bare-bones install
If you decide to do just an absolute minimal install, and effectively skip the MS-DOS 4.0x install program, you don’t need to worry about the buggy MS-DOS 4.0x installer.
IMGMAKE hdd.img -t hd -size 32
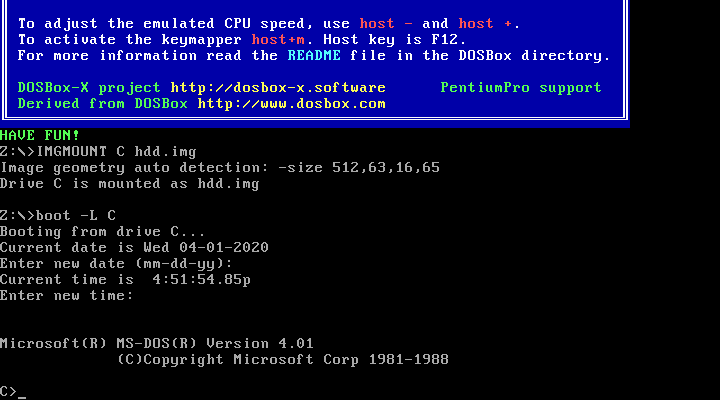
IMGMOUNT C hdd.imgNow you need to boot from the first MS-DOS 4.0x disk, which is called either Setup or Install depending on the media type.
BOOT SETUP.IMG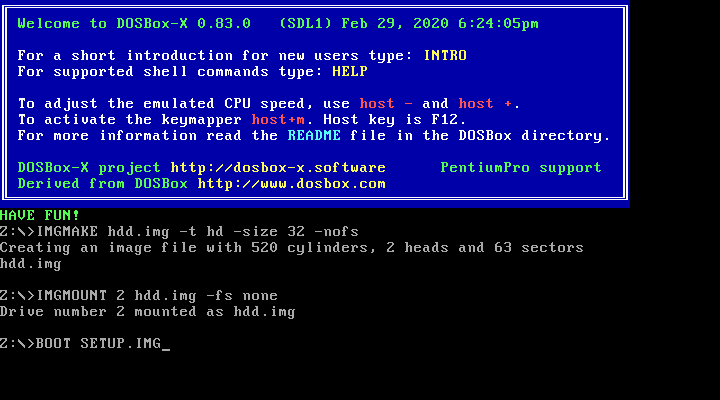
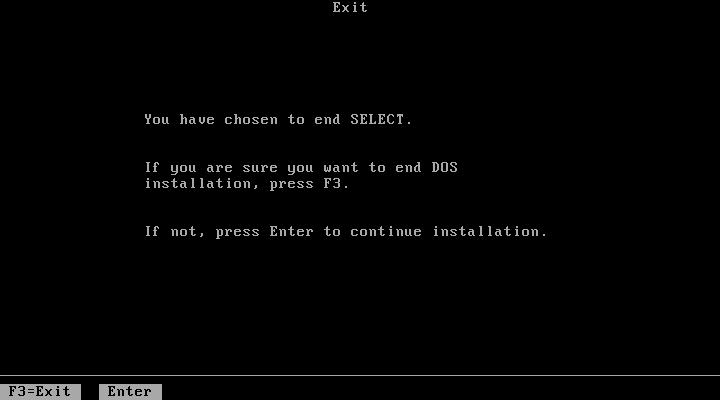
When at the Welcome screen (3.5" media) or prompted to insert the SELECT disk (5.25" media), simply press ESC instead followed by F3 to drop to the MS-DOS prompt
and run the following command to format the C: drive and transfer system files:
FORMAT C: /S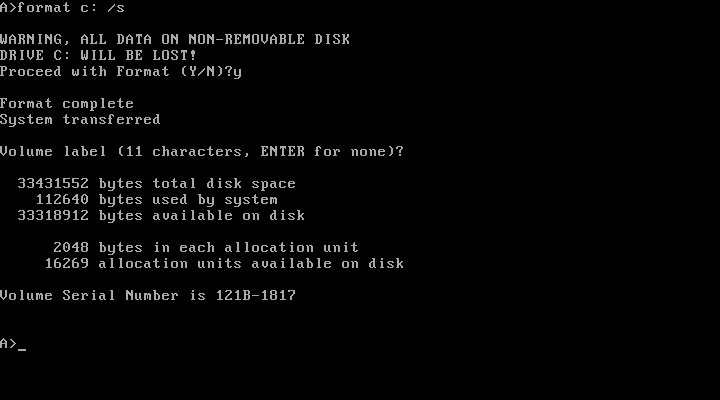
The HDD image is now bootable, and you can optionally copy some DOS utilities from the diskette to the HDD and create your CONFIG.SYS and AUTOEXEC.BAT.
Alternatively if you want to do a full install, you can type SELECT MENU to return to the installer.
Full install from 3.5" media
Notes:
-
The MS-DOS 4.0x installer can corrupt its own installation diskettes, as such it is important that you set the installation disk images read-only.
-
It is required that you first follow the [#bare-bones-install](Bare-bones) install above, up to the point where the DOS partition has been formatted. The alternative is to use the -NOFS flag with
IMGMAKEto create an HDD image that is not partitioned and formatted, and to let MS-DOS 4.0x installer create the partition for you, but this requires that you go through the first phase of the installation process twice, including creating the "SELECT COPY" backup diskette twice.
For this process, it is assumed that you have followed the Bare-bones installation process such that your HDD image file is created, partitioned and formatted with MS-DOS 4.0x.
During install, the installer will insist on a blank disk to be labelled "SELECT COPY", to make a copy of the INSTALL (Setup) disk. Unfortunately while it seems the installer should allow to use the B: drive for this purpose this does not seem to work in practice (it seems this only works if there is no disk in drive B: when the installer starts, which you cannot do with DOSBox-X).
 IMGMAKE SELECT_COPY.IMG -t fd_720
 IMGMOUNT C hdd.img
 BOOT :SETUP.IMG SELECT_COPY.IMG :SETUP.IMG SELECT_COPY.IMG :OPERATING.IMG :MSSHELL.IMG
Notes:
-
You may notice in the above BOOT command, that SETUP.IMG and SELECT_COPY.IMG appear twice. This is not an error, and is done to simplify the installation process due to the fact that the installation process will ask for you to swap between those disks.
-
You may also notice that the original install disks have been pre-fixed with a column (:) character. This is a special way of telling DOSBox-X to treat that disk image as read-only.
-
It is important that you keep track of the order of the disks that you specify on the BOOT line, as you will need to switch between them using either a keyboard shortcut or the "Swap floppy" option on the DOSBox-X menu bar located under the DOS heading. If you loose tray, go to the Drive menu, select A and select 'Drive Information' and you can see which disk is currently active. When you cycle through them one by one, once you reach the end, you will simply go back to the first.
-
While the first MS-DOS 4.0x 3.5" disk is labelled "Setup" the installer will actually refer to it as "INSTALL".
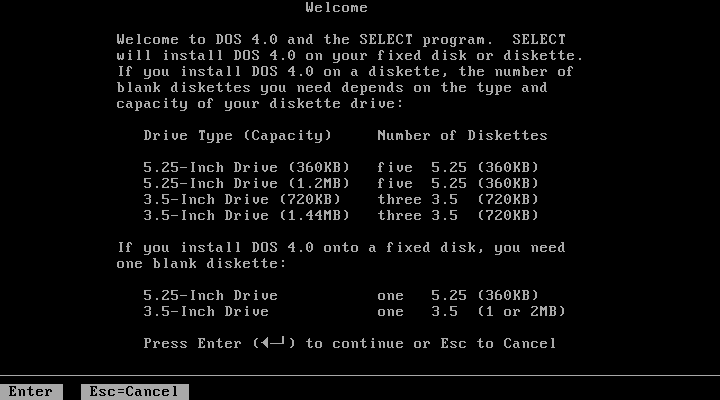
Welcome
When booted to the Welcome screen, simply press Enter as prompted.
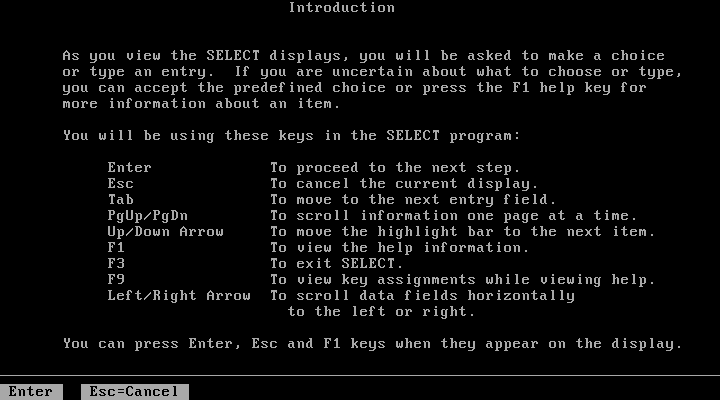
Introduction
Press again Enter to bypass the Introduction screen.
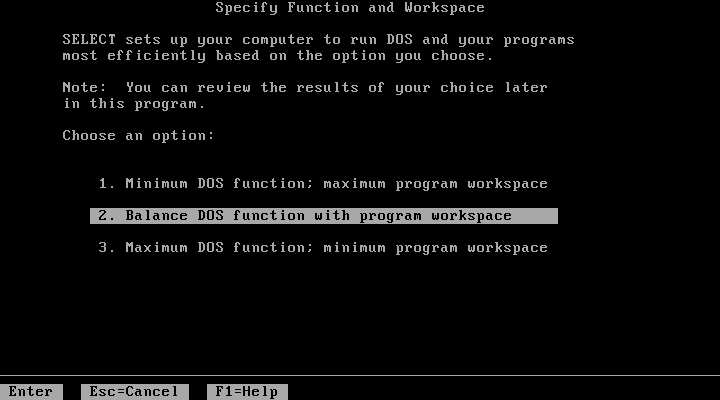
Specify Function and Workspace
You will now be asked between 3 installation options. "program workspace" in this context means the amount of RAM available for programs. Based on your decision FASTOPEN will be enabled, and various DOS buffers will be adjusted.
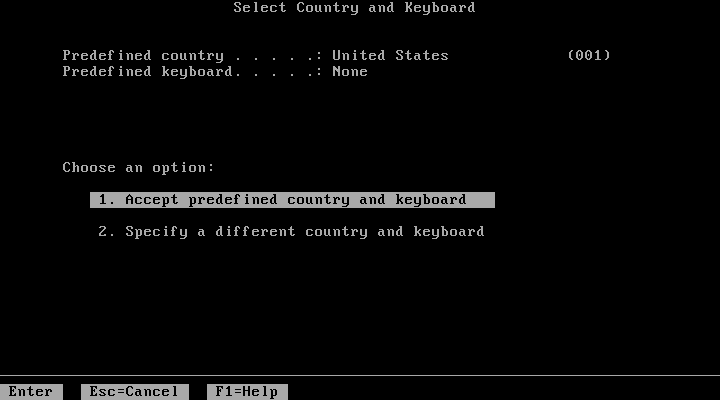
Select Country and Keyboard
You can now change the country and keyboard settings if necessary. Select option 1 when ready to continue.
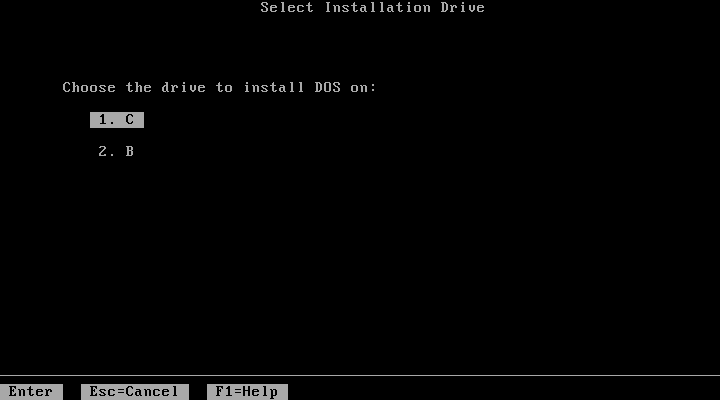
Select Installation Drive
It will now ask where you want to install MS-DOS 4.0x. Select to install on the C: (option 1).
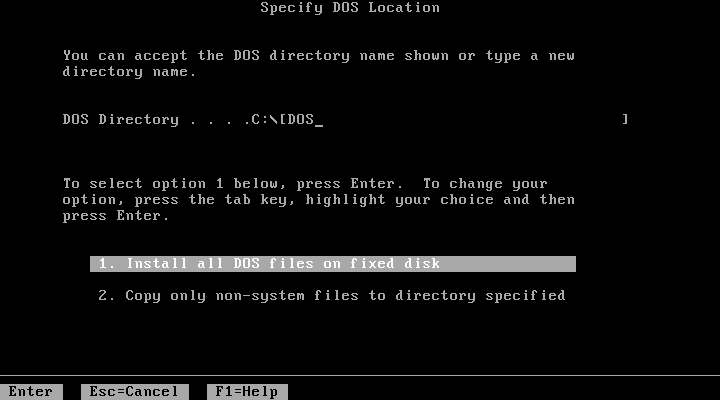
Specify DOS Location
If you want you can change the directory into which DOS will be installed, but you probably want to stick to the default, so press Enter to accept option 1.
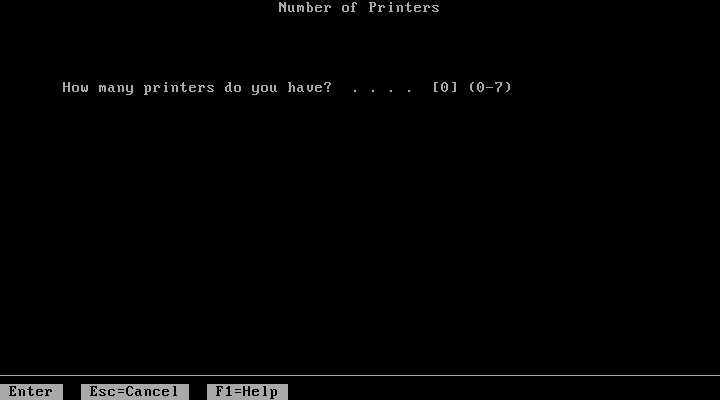
Number of Printers
You should probably just leave this at 0. Press Enter to continue.
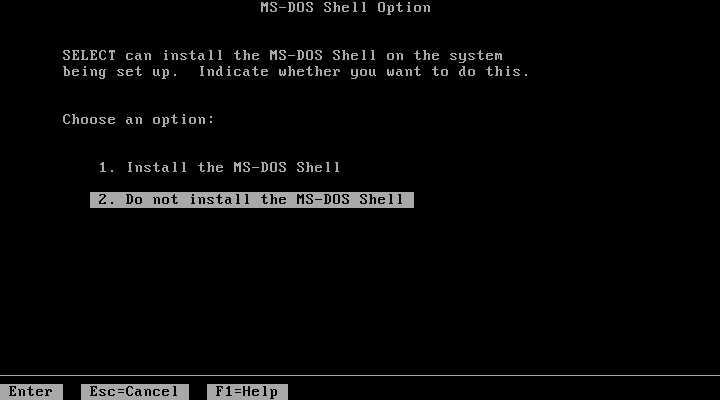
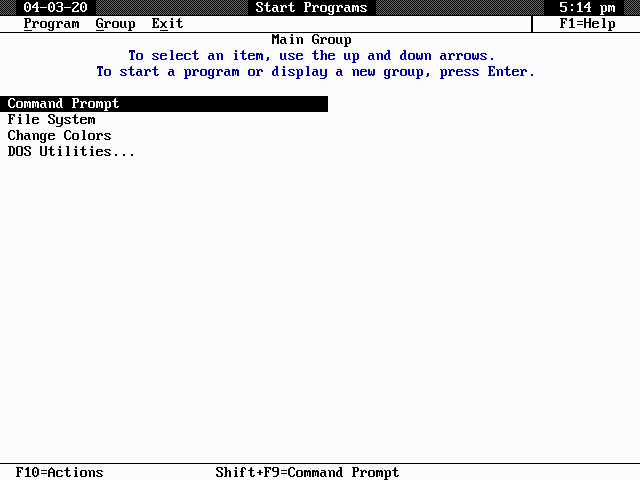
MS-DOS Shell Option
Here you can elect to install the MS-DOS Shell, which will automatically start on boot if selected.
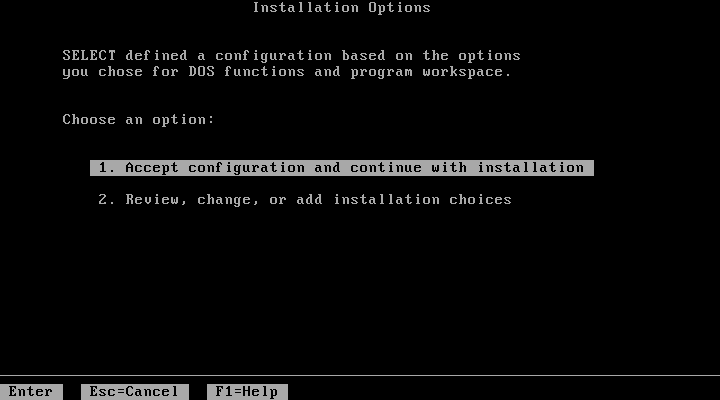
Installation Options
Here you can review the options. Select option 1 to accept and continue with installation.
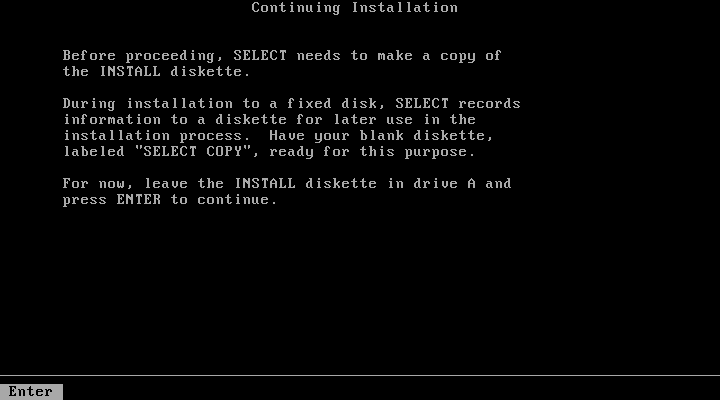
Continuing Installation
This screen is to notify you that you need to have a blank disk ready. Just press Enter to continue.
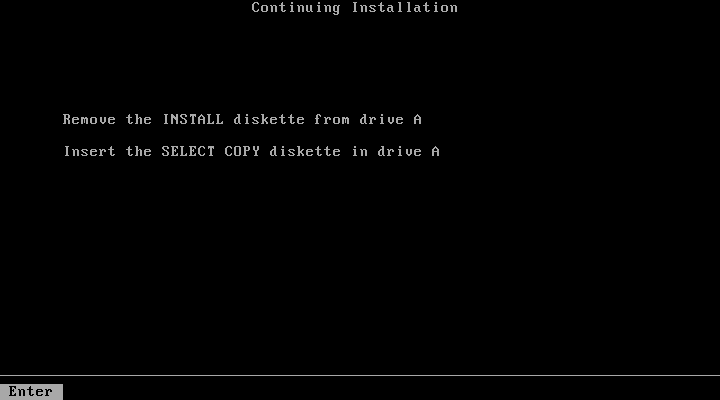
Continuing Installation
This is an important point, you now need to do a disk swap. This can be accomplished with a hot-key combination, or possibly easier from the DOSBox-X menu bar, select the "DOS" menu, followed by "Swap floppy". It is important that you use the "Swap floppy" option each time it asks you to insert a different disk. The disks have been "stacked" with the BOOT command in such a way that they are in the correct order. If you loose track which disk is inserted, check the 'Drive' > 'A' > 'Drive Information' menu option.
You will be asked in turn to insert the "INSTALL" disk (Setup), the "SELECT COPY" disk, again the "INSTALL DISK" and again the "SELECT COPY" disk. You will then be asked for the OPERATING disk, and finally (if selected to install), the MS-DOS SHELL disk.
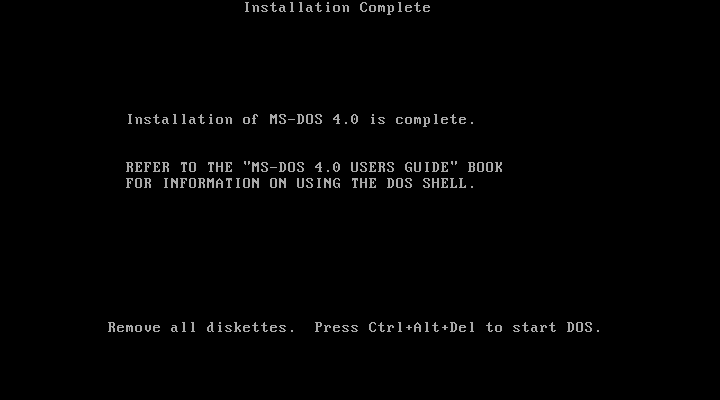
Installation Complete
The installation is complete, and we can reset DOSBox-X from the "Main" menu with "Reset guest system", and we should be back at the DOSBox-X Z:\> prompt.
You can now boot the MS-DOS 4.0x HDD image using
IMGMOUNT C hdd.img
BOOT C:
Depending on if the DOS Shell was installed or not, you will either get a DOS prompt or the DOS Shell menu.
Full install from 5.25" media
This process is basically the same as for the 3.5" media, but you have more disks, and they are labelled differently. You will also need two blank disks.
Booting MS-DOS 4.0x from HDD
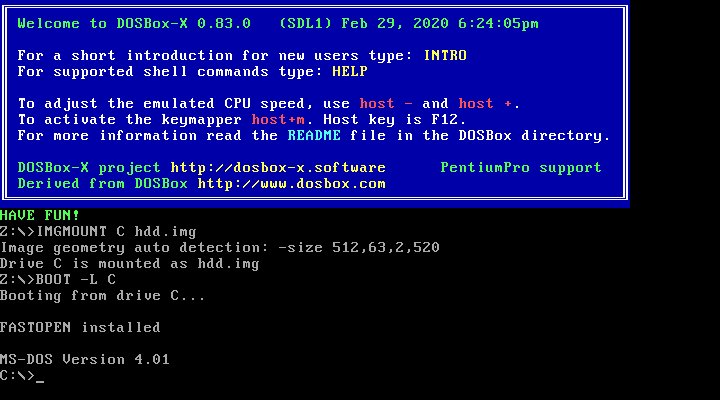
Now that you have created a bootable HDD image you can boot it from the DOSBox-X Z:\> prompt with the following commands:
IMGMOUNT C hdd.img
BOOT C:
Creating an IBM DOS 4.0x HDD image
Installing IBM DOS 4.0x is easier than MS-DOS 4.0x as it comes on only two 3.5" disks (Install and Operating), or five 5.25" disks.
The same limits on disk and partition sizes seem to apply as MS-DOS 4.0x.
First start by creating an HDD image file, mount it and boot from disk (this assumes 3.5" media).
 IMGMAKE hdd.img -t hd -size 1024
 IMGMOUNT C hdd.img
 BOOT :INSTALL.IMG :OPERATING.IMG
You can now largely follow the instructions for MS-DOS 4.0x. There will be fewer questions, for instance you will not get the question if you want to install the DOS Shell. After the installation is finished, and you boot from the HDD image, it will go directly to the DOS Shell program.